
Transfer customer credit from one job to another
With QuickBooks 2019, you can now transfer credits from one customer job to another in just a few clicks.
Note: You must have user access to the Chart of Accounts to complete this process.
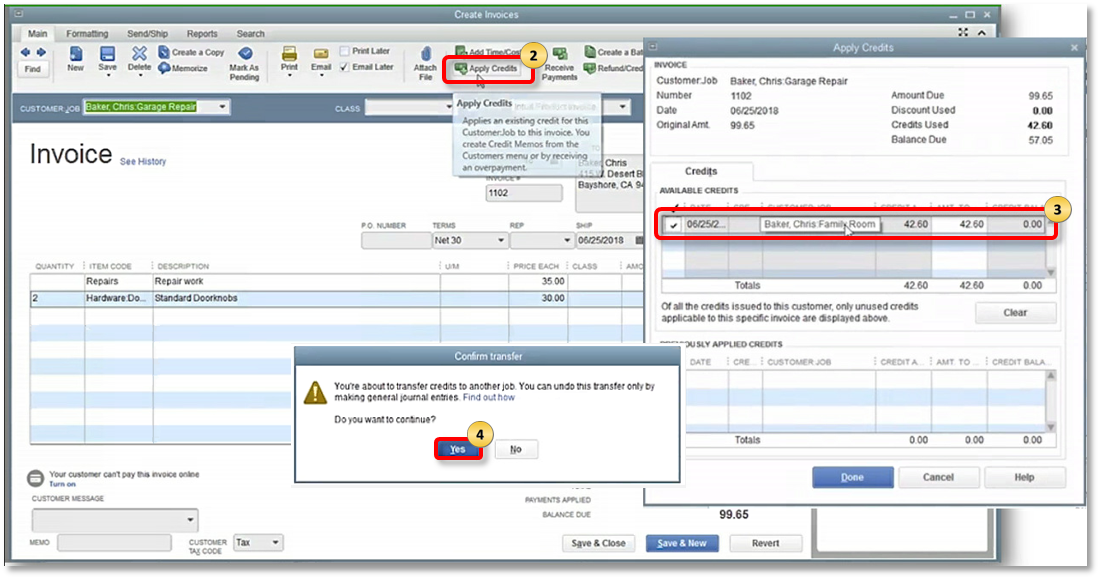
- Open the invoice you're transferring the credit to.
- Select Apply Credits. Credits from another customer job would show under available credits.
- Select the existing credits then Done.
- On the Confirm transfer window, select Yes to complete the transfer. That's it, you're done!
This is an irreversible action. If you need to modify/reverse this action, please be sure to consult with your accountant before making any changes. Contact Us »
When this action is performed, there will be 2 General Journal entries created by QuickBooks to transfer the credits to the required Job. The memo for these journal entries will say “Transfer of Credits for …” to make it easier to understand later. Also, the first time the transfer credits feature is used, QuickBooks creates an “Other Current Assets” clearing account to move the credits. It will show inactive so that it’s only used to transfer credits.
Don't have QuickBooks 2019 yet? Don't worry, you can still transfer credits in the older versions of QuickBooks.
Manually transfer customer credit
If you're using QuickBooks 2018 and earlier or QuickBooks Accountant, you need to manually transfer and apply the credit from one customer job to another. Here's a step-by-step guide:
Step 1: Set up a Clearing account.
See Set up a clearing account for detailed steps.
Step 2: Create a journal entry to move the credit from the customer:job to the wash or clearing account.
- From the Company menu, select Make General Journal Entries.
- On the first line, debit the Accounts Receivable with the amount to be transferred. In the Name column, select the Customer:job you are transferring the credit from.
- On the second line, credit the Clearing Account.
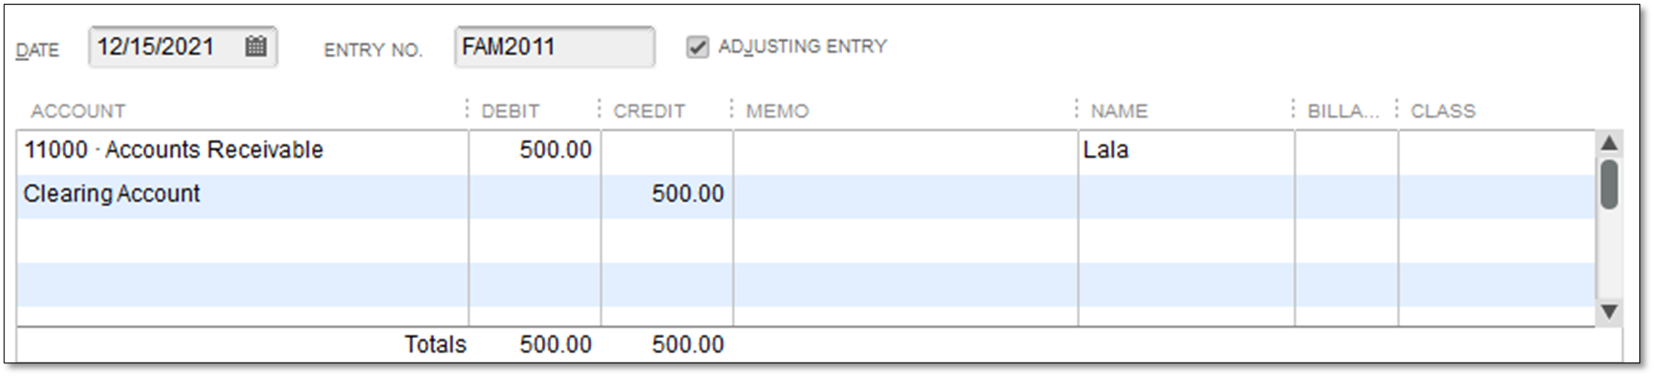
- Select Save & Close.
Step 3: Link the payment or credit to the journal entry.
- From the Customers menu, select Customer Center.
- Choose the customer you are transferring the credit from, then go to the Transactions tab.
If you are linking a payment:
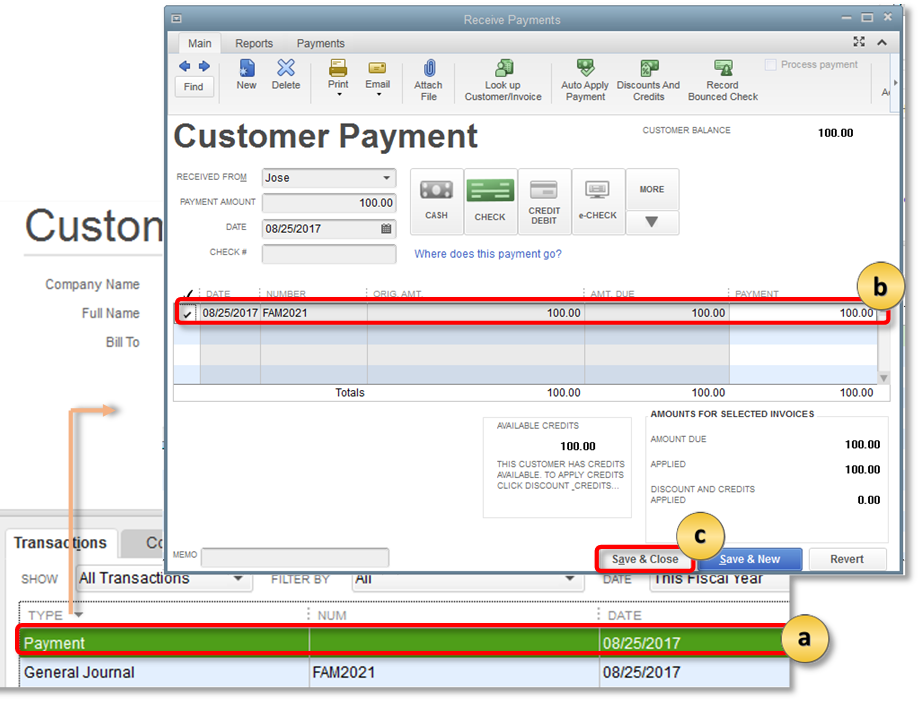
- From the transactions list, double click the payment.
- Put a check mark on the journal entry.
- Choose Save & Close.
If you are linking a credit:
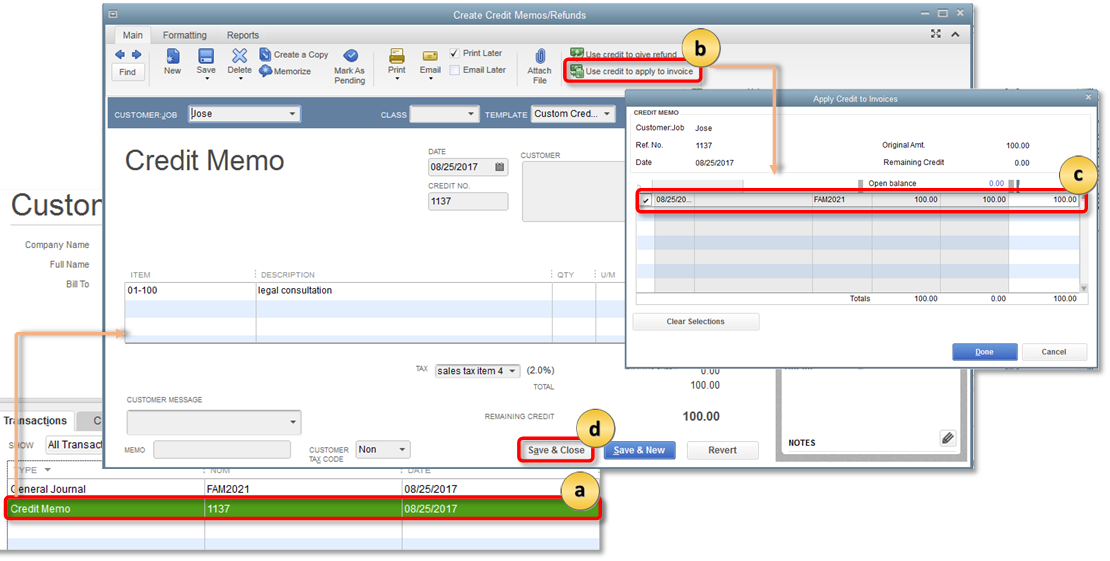
- From the transactions list, double click the credit memo.
- Select Use credit to apply to invoice.
- Put a check mark on the journal entry then select Done.
- Choose Save & Close.
Step 4: Create a journal entry to move the credit from the clearing account to another customer:job.
- From the Company menu, select Make General Journal Entries.
- On the first line, credit the Accounts Receivable with the amount to be transferred. In the Name column, select the Customer:job you are transferring the credit to.
- On the second line, debit the Clearing account.

- Select Save & Close.
Step 5: Apply the credit to the unpaid invoice.
- From the Customers menu, select Receive Payments.
- Choose the Customer:job you are transferring the credit to.
- Put a check mark on the appropriate invoice, then select Discounts & Credits.
- Go to the Credits tab and select the credit(s) you wish to apply, then select Done.
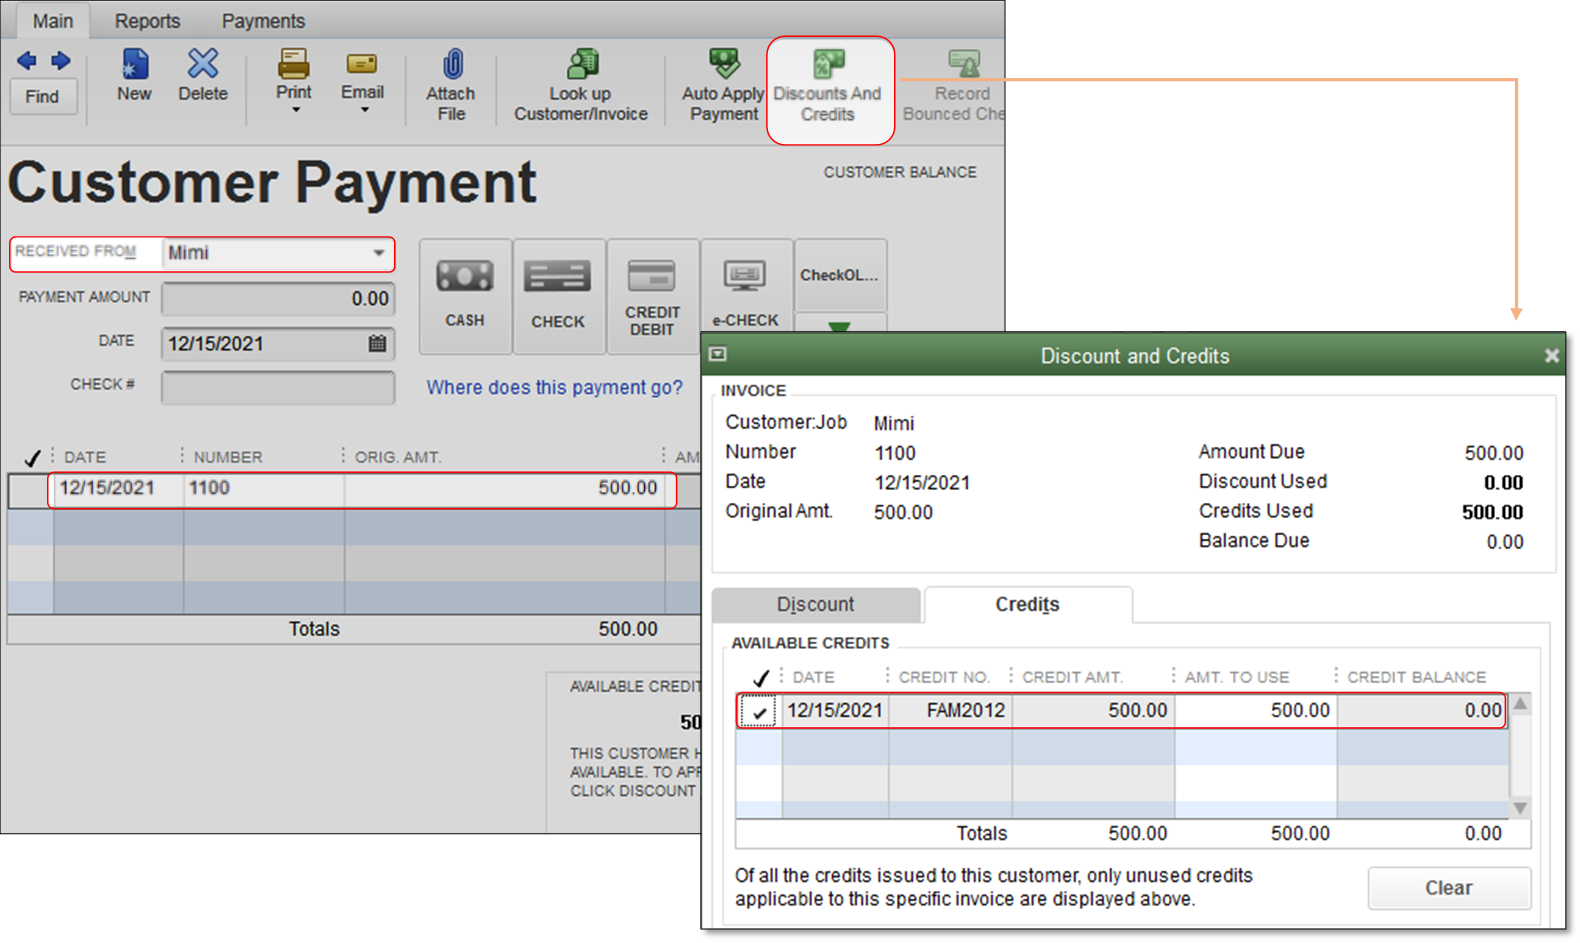
- Choose Save & Close.